PocketWriter: Imperfectly Perfect Prose with RNN

In this post, we embark on a captivating journey into the realm of text generation through the power of Recurrent Neural Networks (RNNs) with TensorFlow. Our adventure unfolds by selecting a book of personal preference as the training dataset. As we set our RNN in motion using this textual treasure trove, it learns to emulate the distinctive style of the book's author. While the generated text may not always adhere to conventional coherence, the magic lies in its ability to subtly mimic the author's unique voice. Join me as we embark on this intriguing voyage of literary exploration.
What is a RNN?
A Recurrent Neural Network (RNN) is a type of artificial neural network designed to process sequences of data. Unlike traditional feedforward neural networks, which process data in a fixed, one-directional flow, RNNs have loops that allow them to maintain a hidden state or memory of previous inputs. This capability makes RNNs well-suited for tasks that involve sequences, such as time series analysis, natural language processing, and speech recognition.
In essence, an RNN can be thought of as a network with memory, allowing it to consider not only the current input but also the context of previous inputs in the sequence. This makes RNNs particularly useful for tasks where the order of data points matters and where information from the past can influence the interpretation of the present.
Preparing Your Environment
We'll harness Conda to effortlessly install all the required packages. Simply follow these steps to streamline the process.
Here's how to install Miniconda:
1. Download Miniconda: Visit the Miniconda website: https://docs.conda.io/en/latest/miniconda.html Download the appropriate installer for your operating system (e.g., Windows, macOS, or Linux).
2. Run the Installer: Once the installer is downloaded, run it by double-clicking the installer file on Windows, executing the script on Linux, or opening the package on macOS.
3. Follow the Installation Wizard: The installation wizard will guide you through the installation process. You can usually accept the default options, but you can customize the installation location if needed.
4. Initialize Conda: After the installation is complete, open a new terminal or command prompt. Conda should now be installed, but you'll need to initialize it by running the following command:
#In Windows
conda init cmd.exe

#In Mac or Linux
conda init
To verify that Conda is installed and working correctly, you can run the following command, which should display Conda's version information:
conda --version5. Create your environment: To establish and activate your 'pocketwriter' environment, simply enter the following code into your terminal
#Create env
conda create --name pocketwriter

#Activate env
conda activate pocketwriter
6. Install libraries: Now, let's bring the power of TensorFlow to your environment. TensorFlow is a versatile machine learning framework developed by Google that's widely used for various AI and deep learning tasks.
To install TensorFlow, open your terminal and activate your 'pocketwriter' environment if you haven't already done so. Next, use Conda to install TensorFlow:
#tensorflow
conda install -c conda-forge tensorflow
Selecting Inspirational Authors
Choosing authors whose writing styles resonate with you is a critical step. These authors will serve as the bedrock upon which the RNN-generated personas are built. Their distinctive styles will influence the character and tone of the text the RNN generates, making it essential to pick authors whose work you admire and wish to emulate.
In my case, I've opted for 'Cien años de Soledad' by Gabriel García Márquez as the training data—a cherished favorite among my literary choices. As for you, feel free to make your own selection; just keep in mind that we require the chosen book in plain text format (txt).
Beginning the Magic
Open your preferred code editor (we recommend VSCode) and start a new project. Within this project, create the following folder structure:
project
..data
....training
Inside the ./data/training directory, simply copy and paste your selected author's titles in plain text format. It would look like this:
project
..data
....training
......cien-annos-de-soledad.txt
......cronicas-de-una-muerte-anunciada.txt
Understanding Text Data: Corpus and Vocabulary
Creating a corpus and a vocabulary is a fundamental step in natural language processing and text analysis tasks. Here's an explanation of why both are essential:
1. Corpus:
- A corpus is a collection of text documents, sentences, or other units of text used for analysis and training of language models.
- It serves as the primary source of text data for various natural language processing tasks, such as text classification, sentiment analysis, machine translation, and text generation.
- A well-structured corpus allows you to train language models, extract statistical patterns, and gain insights into the language's structure and usage.
- In text generation tasks, the corpus provides the source material from which the model learns and generates coherent text.
We load the corpus using the following function, located in the utils.pyfile in the root folder.
def load_corpus(folder):

    paths_to_file = get_all_files_in_folder(folder)

    corpus = ""

	# Load text data from each file and concatenate
    for path_to_file in paths_to_file:
        corpus += open(path_to_file, "rb").read().decode(encoding="utf-8")
    return corpus
2. Vocabulary (Lexicon):
- A vocabulary, or lexicon, is a set of all unique words or tokens that appear in the corpus.
- It defines the scope of words the language model will understand and generate.
- The vocabulary is crucial for converting text data into a numerical format that machine learning models can process.
- It helps in encoding text as numerical sequences (e.g., word embeddings) for training models like neural networks.
- A limited vocabulary size is often used to manage computational complexity and memory requirements.
We create the vocabulary using the following function, located in the utils.pyfile in the root folder.
def create_vocab(corpus):
    return sorted(set(corpus))
Translating Our Corpus for the RNN
To empower the RNN with the ability to process our data, it's crucial to ensure it comprehends the information. This is where 'tf.keras.layers.StringLookup' comes into play, enabling us to create a meaningful representation.
tf.keras.layers.StringLookup is a TensorFlow function that converts strings (e.g., words or tokens) into numerical representations. It assigns a unique integer to each string in a given vocabulary, making it easier for machine learning models like RNNs to work with textual data.
We create the do this using the following function, located in the utils.pyfile in the root folder.
def translate_vocab_for_the_rnn(vocab):
    ids_from_chars = tf.keras.layers.StringLookup(
        vocabulary=list(vocab), mask_token=None
    )
    return ids_from_chars
Enhancing RNN Output for Human Understanding
As you might expect, the RNN generates output in the form of numerical sequences, which may not be immediately comprehensible to most humans. To bridge this gap, we employ a translation function found in 'utils.py' to convert this output into a more understandable language.
def translate_rnn_output(ids):
    chars_from_ids = tf.keras.layers.StringLookup(
        vocabulary=ids.get_vocabulary(), invert=True, mask_token=None
    )
    return chars_from_ids
If you examine it closely, you'll notice that it's nearly identical to the previous function. However, this time, we've introduced a new parameter, 'invert=True,' which allows us to retrieve the token from its numerical representation.
Generating the Actual Dataset
Now that we have our books and a method to help the RNN understand it, it's time to create the actual dataset using the following function:
def create_dataset(corpus, sequence_length=100, batch_size=64, buffer_size=10000):
    numerical_ids = translate_input_for_the_rnn(tf.strings.unicode_split(corpus, "UTF-8"))

    ids_dataset = tf.data.Dataset.from_tensor_slices(numerical_ids)

    sequences = ids_dataset.batch(sequence_length + 1, drop_remainder=True)

    dataset = sequences.map(split_input_target)

    dataset = (
        dataset.shuffle(buffer_size)
        .batch(batch_size, drop_remainder=True)
        .prefetch(tf.data.experimental.AUTOTUNE)
    )

    return dataset
Here's a breakdown:
numerical_ids = translate_input_for_the_rnn(tf.strings.unicode_split(corpus, "UTF-8")): This line takes the 'corpus' (text data) and converts it into numerical IDs that the RNN can understand.ids_dataset = tf.data.Dataset.from_tensor_slices(numerical_ids): It creates a TensorFlow dataset from the numerical IDs.sequences = ids_dataset.batch(sequence_length + 1, drop_remainder=True): It forms sequences of a fixed length (defined by 'sequence_length') from the dataset. These sequences are used for training, with one extra character as the target.dataset = sequences.map(split_input_target): This line splits each sequence into input and target parts, which the RNN uses to learn patterns in the data.dataset = (dataset.shuffle(buffer_size).batch(batch_size, drop_remainder=True).prefetch(tf.data.experimental.AUTOTUNE)): It shuffles the dataset, organizes it into batches, and prefetches data to improve training speed.- Finally, the function returns the prepared dataset for training the RNN.
Building the Model
With the Dataset in Hand, It's Time to Craft a Training Model
class PocketWriterModel(tf.keras.Model):
    def __init__(self, vocab_size, embedding_dim, rnn_units):
        super().__init__(self)
        self.embedding = tf.keras.layers.Embedding(vocab_size, embedding_dim)

        self.gru = tf.keras.layers.GRU(
            rnn_units, return_sequences=True, return_state=True
        )
        self.dense = tf.keras.layers.Dense(vocab_size)

    def call(self, inputs, states=None, return_state=False, training=False):
        x = self.embedding(inputs, training=training)

        if states is None:
            states = self.gru.get_initial_state(x)

        x, states1 = self.gru(x, initial_state=states, training=training)

        x = self.dense(x, training=training)

        if return_state:
            return x, states2
        else:
            return x
Here's an explanation of the key components of this code:
- Definition:
PocketWriterModelis defined as a subclass oftf.keras.Model, indicating that it's a custom neural network model.
2. __init__ Method: This method is called when an instance of the class is created. It initializes the model's architecture. The constructor takes three arguments: vocab_size, embedding_dim, and rnn_units.
vocab_size: The size of the vocabulary, representing the number of unique words in the text data.embedding_dim: The dimensionality of word embeddings. Word embeddings are dense vector representations of words.rnn_units: The number of units (neurons) in the GRU (Gated Recurrent Unit) layers.
Layers: Inside the constructor, the model is defined by stacking several layers:
Embedding Layer: In simple words is like a translator that converts words (represented as numbers) into meaningful vectors. These vectors help the neural network understand the meaning of words in the context of the task at hand, making it a crucial component in NLP and text-related tasks.GRU Layers: In simple words is like a component of a neural network that can process sequences of data, remember important information from previous steps, and produce new sequences of information as output. It's particularly useful when dealing with tasks that involve understanding and generating sequences of dataDense Layer: In simple words is like a building block in a neural network that transforms input data into output data by adjusting its internal knobs (weights and biases) through a mathematical operation.
3. call Method: This method defines the forward pass of the model, specifying how input data flows through the layers. It takes several arguments:
inputs: The input data (usually sequences of word indices).states: The initial states of the GRU layers (optional).return_state: A boolean indicating whether to return the final state (optional).training: A boolean indicating whether the model is in training mode (optional).
Inside the call method, the following steps occur:
- The input sequences are passed through the embedding layer to convert word indices to dense vectors.
- If initial states are not provided (
states is None), the initial states for the GRU layers are obtained usinggru1.get_initial_state. - The input sequences are passed through the first GRU layer (
gru1), which returns sequences and intermediate states (states1). - The sequences are then passed through the second GRU layer (
gru2), which returns sequences and final states (states2). - Finally, the output sequences are passed through the dense layer to produce the model's output.
- Output: Depending on the value of
return_state, the method returns either the output sequences (x) or both the output sequences and the final state (states2) of the second GRU layer.
Model Training: Building Text Generation Skills
After all the diligent preparation we've undertaken, the moment has arrived to commence training our model. We'll initiate this crucial phase by leveraging the function provided in train.py, bringing together all our prior efforts to refine and enhance the model's capabilities for text generation.
def train_model(dataset_folder, epochs):

    corpus = load_corpus(dataset_folder)
    vocab = create_vocab(corpus)

    vocab_ids = translate_input_for_the_rnn(vocab)
	chars_from_ids = translate_rnn_output(vocab_ids)

    dataset = create_dataset(corpus, vocab_ids)

    model = PocketWriterModel(
        vocab_size=len(vocab_ids.get_vocabulary()),
        embedding_dim=256,
        rnn_units=1024,
    )

    loss = tf.losses.SparseCategoricalCrossentropy(from_logits=True)
    model.compile(optimizer="adam", loss=loss)
    checkpoint_dir = "./data/checkpoints"

    checkpoint_prefix = os.path.join(checkpoint_dir, "ckpt_{epoch}")
    checkpoint_callback = tf.keras.callbacks.ModelCheckpoint(
        filepath=checkpoint_prefix, save_weights_only=True
    )

    #train
    model.fit(dataset, epochs=epochs, callbacks=[checkpoint_callback])

	#saving
	one_step_model = OneStepWriterModel(model, chars_from_ids, vocab_ids)
	tf.saved_model.save(one_step_model, "one_step")
The train_model function is responsible for training a text generation model using a given dataset. Here's a breakdown of what this function does:
1. Load and Prepare the Dataset:
- It starts by loading the text corpus from a specified dataset folder using the
load_corpusfunction. - Then, it creates a vocabulary from the corpus using the
create_vocabfunction.
2. Data Preprocessing:
- The vocabulary is translated into numerical IDs using
translate_input_for_the_rnn, making it suitable for model input. - A dataset is created from the corpus and translated vocabulary using the
create_datasetfunction. This dataset is structured for training.
3. Model Initialization:
- It initializes a
PocketWriterModelwith specific hyperparameters: vocab_size: The size of the vocabulary (number of unique tokens).embedding_dim: The dimensionality of the embedding layer.rnn_units: The number of units in the GRU (Gated Recurrent Unit) layer.
4. Model Compilation:
- The model is compiled with the following configurations:
- Loss function: Sparse categorical cross-entropy (
SparseCategoricalCrossentropy) with logits, is a loss function used for training models in classification tasks where the class labels are represented as integers. It helps the model learn to produce probability distributions that match the true class labels, ultimately leading to better classification accuracy during training.. - Optimizer: Adam optimizer (
"adam").
5. Checkpoint Setup:
- It defines a directory for saving model checkpoints (
checkpoint_dir). - Specifies a checkpoint prefix based on the epoch number (
checkpoint_prefix). - Sets up a checkpoint callback (
ModelCheckpoint) to save model weights at the end of each epoch.
6. Training:
- The model is trained using the
fitmethod with the prepared dataset and a specified number of training epochs. - During training, model checkpoints are saved to the designated directory based on the specified prefix.
7. Model Save:
- Finally, the trained model is saved.
Text Generation one Step a time
If you've closely examined the training method, you may have noticed something we haven't explained yet in the final lines. I'm referring to the line where we create the one_step_model:
one_step_model = OneStepWriterModel(model, chars_from_ids, vocab_ids)Let me elaborate on what this line does and why it's important for generating text with the trained model.
It instantiates a model capable of generating text one step at a time. A one-step generator is a crucial component when using Recurrent Neural Networks (RNNs) for text generation. It serves as the "creative engine" of the RNN, responsible for generating each successive element in a sequence, be it a word, character, or any other unit. This generator takes the model's current state and the previously generated output and produces the next item in the sequence. By breaking down the generation process into individual steps, the RNN can create coherent and contextually relevant text, making it an essential tool for various natural language processing tasks, such as language modeling, machine translation, and creative writing.
class OneStepWriterModel(tf.keras.Model):
    def __init__(self, model, chars_from_ids, ids_from_chars, temperature=1.0):
        super().__init__()
        self.temperature = temperature
        self.model = model
        self.chars_from_ids = chars_from_ids
        self.ids_from_chars = ids_from_chars

        # Create a mask to prevent "[UNK]" from being generated.
        skip_ids = self.ids_from_chars(["[UNK]"])[:, None]
        sparse_mask = tf.SparseTensor(
            # Put a -inf at each bad index.
            values=[-float("inf")] * len(skip_ids),
            indices=skip_ids,
            # Match the shape to the vocabulary
            dense_shape=[len(ids_from_chars.get_vocabulary())],
        )
        self.prediction_mask = tf.sparse.to_dense(sparse_mask)

    @tf.function
    def generate_one_step(self, inputs, states=None):
        # Convert strings to token IDs.
        input_chars = tf.strings.unicode_split(inputs, "UTF-8")
        input_ids = self.ids_from_chars(input_chars).to_tensor()

        # Run the model.
        # predicted_logits.shape is [batch, char, next_char_logits]
        predicted_logits, states = self.model(
            inputs=input_ids, states=states, return_state=True
        )
        # Only use the last prediction.
        predicted_logits = predicted_logits[:, -1, :]
        predicted_logits = predicted_logits / self.temperature
        # Apply the prediction mask: prevent "[UNK]" from being generated.
        predicted_logits = predicted_logits + self.prediction_mask

        # Sample the output logits to generate token IDs.
        predicted_ids = tf.random.categorical(predicted_logits, num_samples=1)
        predicted_ids = tf.squeeze(predicted_ids, axis=-1)

        # Convert from token ids to characters
        predicted_chars = self.chars_from_ids(predicted_ids)

        # Return the characters and model state.
        return predicted_chars, states
Crafting Texts with our RNN
After training our model, let's assess its writing skills by using the function in the 'predict.py' file.
def predict(model_folder, initial_word="Aureliano:"):

	one_step_reloaded = tf.saved_model.load(model_folder)

    word = input("Say something to your model (exit to close): ")

    if not word:
        word = initial_word

    while word != "exit":
        start = time.time()
        states = None
        next_char = tf.constant([word])
        result = [next_char]

        for n in range(1000):
            next_char, states = one_step_reloaded.generate_one_step(next_char, states=states)
            result.append(next_char)

        result = tf.strings.join(result)
        end = time.time()
        print(result[0].numpy().decode("utf-8"), "\n\n" + "_" * 80)
        print("\nRun time:", end - start)

        word = input("Say something to your model (exit to close): ")
Now, let's interact with our model and observe its predictions.
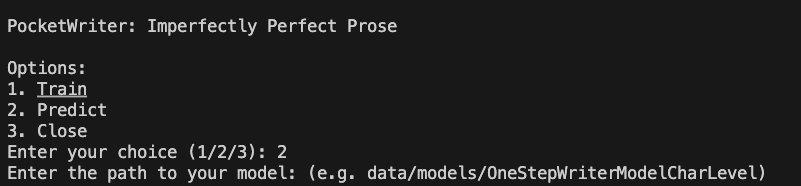
#Navigate to the project directory and then enter the following command:
python main.py
In the following screen, choose option 2 and provide the path to your model.
Now, input a query or text to your model, and observe the response it generates.

The model ouput
Aureliano Buendia era unar para vinte un par la bascitar parado, y al su pan-.E habían potiero, en espuentos. Se la casa aginionte había a suerte hachorandotarr y cuno estra tentalmes: no los como sera un éllla.

Vio festaban la volvistenía en día de hochaba alpro senra, siera de erla canto que las ersel clurranda de la muchastan páfitala elo ero encocho mardibra y si pulos sintara tos entues armunos dumedio en Vira inta se despuéscon la per un asccian de quecellaumanero, nos casta de lleguna si la aspersecado Arcallaba daspos des un carso, ense la muedo la cataro Vinda de sumó.

Hóbos que lo revescadre estabvenla se piciarlo que esdo hombraca la ser igía que llevarma lucó so dedo corosena sustaba a José Arasdados y una el clargalos, y la gnosasba plaza caceltres para la la nostimper se yadorada Rolvortado para que re el hue timsaipa blaza se note ento el la Mombaza petraz medivo un comatalladrars cas de sa Salidar. Cueren.áY, de dunosa conas huertos y consar de con Arca imprátile. «Tasidadas horibtosasdencia
As you may have noticed, it generates nonsensical words and sentences. However, it has partially grasped the structure of words. Keep in mind that we trained this model using character-level vocabulary.
The simplest way to enhance its performance is by extending the training epochs. However, now let's explore an alternative improvement by shifting to a word-level vocabulary. We accomplish this by constructing a training data vocabulary using words instead of characters, utilizing the function provided below.
def create_vocab(corpus, charVocab=True):
    if charVocab:
        return sorted(set(corpus))
    else:
        vocab = set()
        words = re.split(r'[ \n,.\t]+', corpus)
        vocab.update(words)

		return sorted(vocab)
The model ouput
Aureliano Buendia era su la la pesar en el que implacable inclusive hizo había Prudencio de favor con el recogió la Prudencio le inclusive hizo le inclusive hizo le inclusive fusila pesar en aun José hasta Prudencio le inclusive hizo a su recogió recogió Pero al lo había quien razón recogió recogió Rebeca pesar con una Prudencio Úrsula pesar en sentenciado en que inclusive explicó Aureliano de viendo le inclusive infundió compadre hace hizo se inclusive irrevocable inclusive hizo con como su recogió al a la pesar en Aquella pesar en Por con Y agregó en ambos Y el Diez Eran Fue inclusive In this context, it generates sentences; nevertheless, it encounters challenges in consistently weaving words together in a coherent manner. To attain superior results, we must not only enhance our model but also acquire more data and increase the number of training iterations.
We have introduced a text generator using RNN, focusing on essential concepts and building a foundational model for understanding and enjoyment. Now, it's your turn to elevate what we've just learned and take things to the next level. Enjoy coding and exploring new possibilities!
The inspiration for this post is drawn from the following source: Link to the GitHub repository.