Building Immersive Web Apps: A Guide to Creating Interactive Experiences with React, Three, and Fiber (R3F).

Welcome to our tutorial on building immersive web apps using React, Three, and Fiber! In this guide, we'll explore how Fiber, a React renderer for Three, empowers developers to create stunning scenes declaratively, making it easier than ever to deploy amazing web apps and even mobile apps with captivating 3D elements.
Traditionally, creating interactive 3D experiences on the web required a complex and often cumbersome workflow. However, the combination of React, a popular JavaScript library for building user interfaces, and Three, a powerful 3D graphics library, has revolutionized the way we develop web applications with immersive visuals.
But what about Fiber? Fiber takes the integration of React and Three to the next level by providing a render pipeline specifically designed for highly performant, reactive UI rendering with Three and React. It seamlessly combines the declarative nature of React with the powerful capabilities of Three, enabling developers to create dynamic and engaging 3D scenes in a more intuitive and efficient manner.
With Fiber, you can describe your 3D scenes using a declarative syntax that closely resembles React components. This approach brings the benefits of component reusability, modular code organization, and easier maintenance to the world of 3D development. Whether you're building a game, a product configurator, or a data visualization tool, Fiber simplifies the process and allows you to focus on unleashing your creativity.
Moreover, the versatility of Fiber extends beyond web apps. With the rise of mobile applications and augmented reality experiences, being able to create 3D elements that seamlessly integrate with your app's UI becomes increasingly important. Fiber empowers you to bring those captivating 3D elements to your mobile apps, providing a consistent and seamless experience across different platforms.
Throughout this tutorial, we will guide you step by step in leveraging the power of React, Three.js, and Fiber. By the end, you'll have a solid understanding of how to create declarative 3D scenes, add interactivity and animations, optimize performance, and ultimately deploy your impressive web apps and mobile apps.
So, if you're ready to embark on an exciting journey into the world of immersive web app development, let's dive in and unleash the full potential of React, Three.js, and Fiber!
Installation and Setup
Before we dive into creating web apps with React, Three, and Fiber, let's ensure that you have the necessary tools set up on your machine. In this section, we'll guide you through the installation process assuming that you already have Node.js, npm (Node Package Manager), and npx (Node Package Runner) installed. If you haven't installed them yet, please refer to the official documentation for your operating system to set them up before proceeding.
Step 1: Create a New React Project To begin, open your command line interface and navigate to the desired directory where you want to create your new React project. Then, run the following command:
npx create-react-app webappnameThis command initializes a new React project named "webappname" in a folder with the same name. It sets up the basic project structure and installs the necessary dependencies.
Step 2: Navigate to the Project Directory Once the project is created successfully, navigate to the project directory by running the following command:
cd webappnameStep 3: Install Three.js and Fiber Now, we need to install Three and Fiber into our React project. Run the following command to install both libraries:
npm install three @react-three/fiber
This command downloads the required packages and adds them to your project's dependencies.
Step 4: Install Drei If you want to take advantage of additional useful components and utilities for Three.js in React, you can install the drei package. Run the following command to install Drei:
npm install @react-three/dreiStep 5: Verify Installation To verify that the installation was successful, open the project in your preferred code editor. Navigate to the src directory and locate the App.js file. You can start exploring and modifying this file to create your web app with React, Three.js, and Fiber.
Step 6: Running Your Project and Viewing the App
Now that we have set up our project, it's time to see the progress we've made in our web app. To run your project and view the app in your browser, follow these steps:
- Open your command line interface and navigate to the root directory of your project (where the
package.jsonfile is located). - Run the following command:
npm startThis command will start the development server and automatically open your default web browser, displaying your web app.
- If the browser doesn't open automatically, you can manually open it and navigate to
http://localhost:3000. This is the default address where the React development server runs your app. - As you make changes to your code, the development server will automatically update the app in the browser, allowing you to see the live changes without needing to manually refresh the page.
That's it! You can now see your web app running and observe any advances or modifications you make as you continue building your React app with Three.js, Fiber, and Drei.
In the next section, we will delve into the basic React component structure and guide you through the process of creating a Three.js scene within a React component.
Basic react structure
Now that we have our React project set up with Three.js and Fiber, let's explore the basic structure of a React component and how we can create a Three scene within a React component. This understanding will serve as the foundation for building immersive web apps with interactive 3D elements.
In your project directory, navigate to the src folder and open the App.js file. This is where we will define our React component structure.
Step 1: Import Dependencies To begin, let's import the necessary dependencies for our component. Add the following import statements at the top of the App.js file:
import { Canvas } from "@react-three/fiber";
import { OrbitControls, Box } from "@react-three/drei";
Here, we import the Canvas component from @react-three/fiber, which provides the WebGL rendering context for our 3D scene. We also import the OrbitControls and Box components from @react-three/drei, which will be useful for controlling the camera movement and adding 3D objects to the scene, respectively.
Step 2: Define the Component Next, let's define our React component. Remove the existing content within the App function component and replace it with the following code:
function App() {
  return (
    <div
      style={{
        backgroundColor: 'lightseagreen',
        position: 'absolute',
        left: 0,
        right: 0,
        bottom: 0,
        top: 0
      }}
    >
      <Canvas >
        <OrbitControls />
        <ambientLight />
        <pointLight position={[10, 10, 10]} />
        <Box position={[0, 0, 0]} rotation={[1, 1, 0]} />
      </Canvas>
    </div>
  );
}

export default App;
Here, we have a functional component called App that returns the JSX code representing our scene. Inside the Canvas component, we include the OrbitControls component to enable user interaction and camera movement. We also add an ambientLight and a pointLight to illuminate the scene. Finally, we place a Box object at the position [0, 0, 0] and rotation [1, 1, 0] within the scene.
That's it! We have now set up the basic React component structure for our 3D scene using Three.js and Fiber. When you run your React development server, you should see a blank canvas with an interactive camera and a box rendered at the origin.

In the next section, we will explore how to create and customize a Three.js scene within our React component, including adding objects, lights, and materials.
Creating the scene
Now that we have set up our React component structure, let's dive into creating a Three.js scene within our React component. This is where the magic happens as we bring our 3D elements to life.
Let's explore how to load a glTF model into our Three.js scene within our React component. This will allow us to incorporate more complex and visually appealing 3D models into our web app.
Step 1: Import Dependencies In the App.js file, make sure to add the following import statements at the top:
import { useGLTF } from '@react-three/drei'Step 2: Define the Component Inside the App.js file, replace the existing code with the following:
function KaioPlanet(props) {
	const model = useGLTF('./models/kaio_planet/kaio-planet.gltf')
	return (
		<primitive object={model.scene} {...props} />
	)
}


function App() {
	return (
		<div
			style={{
				position: 'absolute',
				left: 0,
				right: 0,
				bottom: 0,
				top: 0
			}}
		>
			<Canvas
				camera={{ position: [0, 0, 20], fov: 75 }}
			>
        		<color attach="background" args={['lightseagreen']} />
				<hemisphereLight intensity={1} rotation={[0, Math.PI * -0.35, 0]}/>
				<KaioPlanet scale={4} rotation={[ 0.5, 2, 0]}/>
				<OrbitControls />
			</Canvas>
		</div>
	);
}

export default App;
Let's break this down to better understand what we have just accomplished.
function KaioPlanet(props) {
  const model = useGLTF('./models/kaio_planet/kaio-planet.gltf');
  return (
    <primitive object={model.scene} {...props} />
  );
}
In this code, we define a functional component called KaioPlanet. This component represents a 3D model of a planet. Within the component, we use the useGLTF hook from the @react-three/drei library to load the glTF model file located at './models/kaio_planet/kaio-planet.gltf' in the publicfolder. The useGLTF hook returns an object, and we extract the model.scene property from it. This model.scene contains the loaded 3D model.
The <primitive> component is then used to render the loaded 3D model in the scene. We pass the model.scene as the object prop, which specifies the object to be rendered. The spread operator {...props} allows us to pass any additional props to the <primitive> component (scale, location, rotation, etc), enabling further customization if needed.
Moving on to the App component:
<Canvas
	camera={{ position: [0, 0, 20], fov: 75 }}
>
	<color attach="background" args={['lightseagreen']} />
	<hemisphereLight intensity={1} rotation={[0, Math.PI * -0.35, 0]} />
	<KaioPlanet scale={4} rotation={[0.5, 2, 0]} />
	<OrbitControls />
</Canvas>
The App component represents the main component that renders the Three.js scene. Within the return statement, we wrap the content inside a <div> element to apply absolute positioning and make the scene fill the entire available space.
The <Canvas> component from @react-three/fiber creates the WebGL rendering context for our 3D scene. We configure the camera using the camera prop, setting its position to [0, 0, 20] and the field of view (fov) to 75.
Next, we use the <color> component and the attach prop to set the background color of the scene to 'lightseagreen'.
The <hemisphereLight> component adds a hemisphere light to the scene, illuminating the objects from multiple directions. We set the intensity prop to 1 and the rotation prop to [0, Math.PI * -0.35, 0] to position the light at a specific angle.
The <KaioPlanet> component is our custom component that we defined earlier. We pass the scale prop as 4 and the rotation prop as [0.5, 2, 0], which scales and rotates the planet accordingly.
Lastly, we include the <OrbitControls> component from @react-three/drei, which allows users to interact with the scene by orbiting around it using mouse or touch controls.
With these components and configurations, the app will render a Three.js scene with a planet model, background color, lighting, and the ability to orbit around the scene, like the one below.
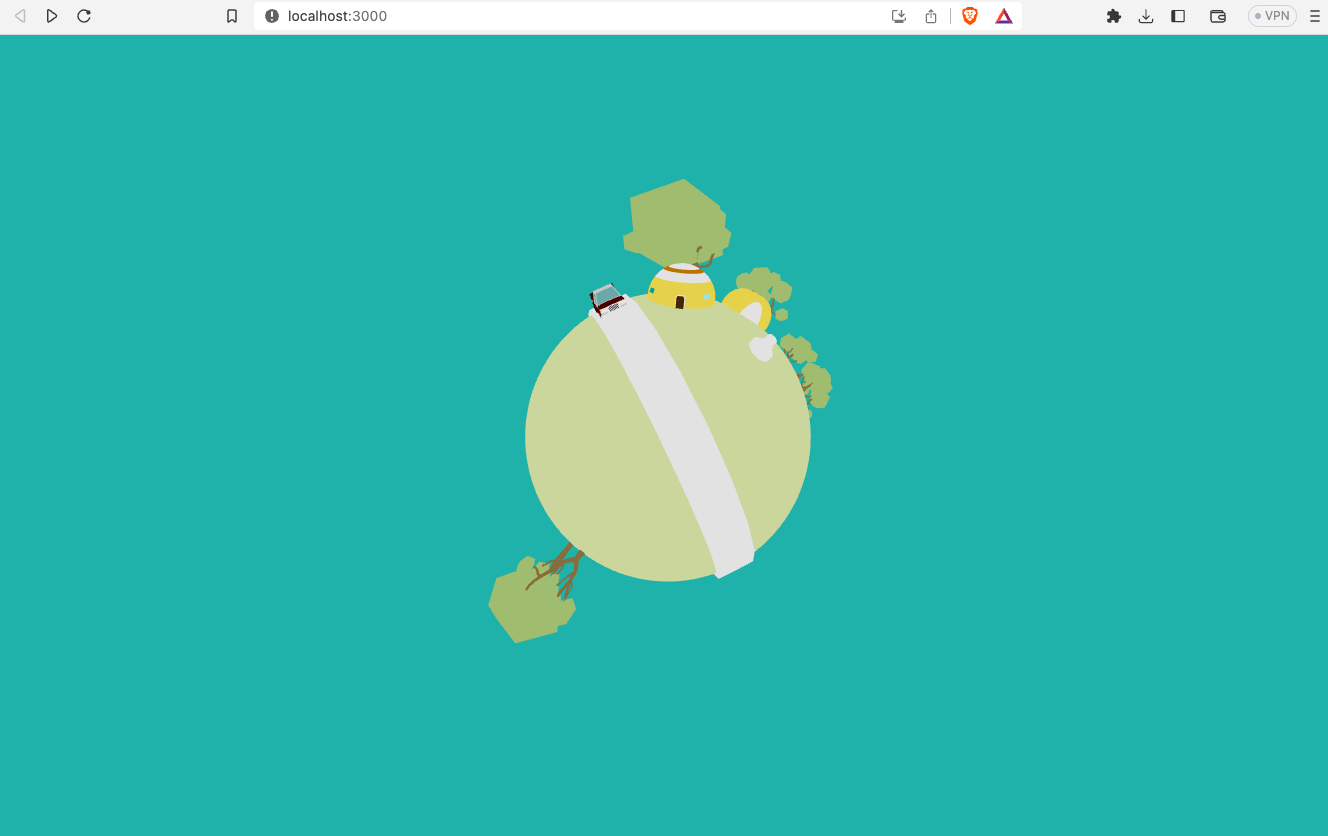
Feel free to modify the code and experiment with different models
Interactivity and animation
Now, let's explore how to add interactivity and animation to our web app using Three.js. These features will enhance the user experience and bring our 3D scene to life.
Step 1: Import Dependencies In the App.js file, make sure to add the following import statement at the top:
import { useGLTF, useFrame } from "@react-three/fiber";Three.js provides powerful animation capabilities to bring our 3D models to life. We can animate various properties of the objects in our scene, such as position, rotation, scale, and more.
Let's animate the rotation of our glTF model. Update the KaioPlanet component in your code as follows:
import { useGLTF, useFrame } from "@react-three/fiber";

function KaioPlanet(props) {
  const model = useGLTF("./models/kaio_planet/kaio-planet.gltf");

  useFrame((state, delta) => {
    model.scene.rotation.y += 0.1 * delta; // Adjust the rotation speed as desired
  });

  return <primitive object={model.scene} {...props} />;
}
The useRef hook is used to create a mutable reference mesh that will be associated with the <primitive> component in the return statement. This reference will allow us to access and modify the properties of the rendered 3D object.
Next, we use the useFrame hook to perform actions on every frame rendered by Three.js. Inside the useFrame function, we have a callback function that receives the current state and delta as arguments.
In this example, we access the rotation.y property of the mesh.current object (which corresponds to the 3D model) and increment it by 0.1 * delta on each frame. This creates a smooth rotation effect around the y-axis. You can adjust the value to control the rotation speed.
Finally, we return the <primitive> component, passing the ref={mesh} prop to associate it with the mesh reference we created. This allows us to access and modify the 3D object's properties. We also set the object prop to model.scene to render the loaded glTF model in the scene. The spread operator {...props} allows for any additional props to be passed to the <primitive> component.
Feel free to customize the rotation speed, experiment with different models, or apply additional transformations and animations to create engaging and interactive 3D experiences.
Play Animations and Bring Your 3D Model to Life
n this section, we will delve into the fascinating world of embedded animations within 3D models. These animations bring models to life, adding movement and dynamism. We will explore how to effectively utilize and leverage these embedded animations to enhance the visual appeal and interactivity of your 3D creations.
function KaioPlanet(props) {
  const mesh = useRef();
  const model = useGLTF('./models/kaio_planet/kaio-planet.gltf');

  let mixer;
  if (model.animations.length) {
    mixer = new THREE.AnimationMixer(model.scene);
    model.animations.forEach(clip => {
      const action = mixer.clipAction(clip);
      action.play();
    });
  }

  useFrame((state, delta) => {
    mixer?.update(delta);
  });

  return <primitive ref={mesh} object={model.scene} {...props} />;
}
This code demonstrates how to play animations inside a 3D model using the mixer object.
A mixer variable is declared. If there are animations present in the model, a new THREE.AnimationMixer is created, associating it with the model.scene. The model.animations.forEach loop iterates over each animation clip in the model.animations array. For each clip, an animation action is created using mixer.clipAction(clip). The action.play() method is called to play the animation.
The useFrame hook is then used to update the animation state on every frame. Inside the useFrame function, mixer?.update(delta) is called to update the animation state with the delta value representing the time elapsed since the last frame.
With this code, animations within the model are played using the mixer, resulting in dynamic and interactive 3D experiences. The animations are updated on each frame, ensuring smooth playback.
Feel free to customize the animations, explore different models and clips, or implement interactivity and user-controlled animation features to enhance the visual appeal of your 3D application.
Elevate Your 3D Experience with User Interaction
Take your 3D experience to the next level by incorporating interactive portals that transport users to new worlds within your scene. These portals add a sense of exploration and discovery, allowing users to immerse themselves in different environments. Here's how you can create interactive portals in your 3D application:
- Let's begin by incorporating the necessary imports to ensure that our app has access to all the required resources to elevate its functionality:
import { useCursor, MeshPortalMaterial, CameraControls, Text, Sky } from "@react-three/drei";
import { useRoute, useLocation } from 'wouter';
import { easing, geometry } from 'maath';
By adding these imports, we ensure that we have access to essential features such as cursor control, mesh portal materials, camera controls, text rendering, sky rendering, and additional utility functions for easing and geometry operations. These imports will enable us to take our app to the next level by incorporating interactive elements, enhanced visual effects, and smooth navigation.
2. Design Portal Geometry: Define the shape and appearance of your portals using geometrical primitives or custom models. Consider using visually striking elements like a doorway, vortex, or magical gateway to create an enticing entrance to new worlds.
function Frame({ id, name, author, bg, width = 1, height = GOLDENRATIO, children, ...props }) {
  const portal = useRef()
  const [, setLocation] = useLocation()
  const [, params] = useRoute('/item/:id')
  const [hovered, hover] = useState(false)
  const onDoubleClick = (e) => {
    e.stopPropagation()
    setLocation('/item/' + e.object.name)
  }
  useCursor(hovered)
  useFrame((state, dt) => easing.damp(portal.current, 'blend', params?.id === id ? 1 : 0, 0.2, dt))
  return (
    <group {...props}>
      <Text fontSize={0.2} anchorY="top" anchorX="left" lineHeight={0.8} position={[-0.375, 1.525, 0.01]} material-toneMapped={false}>
        {name}
      </Text>
      <Text  fontSize={0.1} anchorX="right" position={[0.4, 0.15, 0.01]} material-toneMapped={false}>
        Click on me
      </Text>
      <mesh name={id} position={[0, GOLDENRATIO / 2, 0]}

        onClick={onDoubleClick}
        onPointerOver={(e) => hover(true)} onPointerOut={() => hover(false)}
      >
          <roundedPlaneGeometry args={[width, height, 0.1]} />
        <MeshPortalMaterial ref={portal} events={params?.id === id} side={THREE.DoubleSide}>
          <color attach="background" args={[bg]} />
          {children}
        </MeshPortalMaterial>
      </mesh>
    </group>
  )
}
This code defines a React component called Frame, which represents a frame with interactive properties. Let's break it down:
- The
portalconstant is created using theuseRefhook, which will be used to reference theMeshPortalMateriallater on. - The
setLocationandparamsvariables are obtained using theuseLocationanduseRoutehooks from a router library. These hooks allow for navigation within the application. - The
hoveredandhovervariables are created using theuseStatehook.hoveredrepresents the current hover state, whilehoveris a function to update the hover state. - The
onDoubleClickfunction is triggered when the mesh is double-clicked. It prevents event propagation and updates the location using thesetLocationfunction. - The
useCursorhook is called with thehoveredstate, which handles the cursor behavior based on the hover state. - The
useFramehook is used to animate theportalusing a damping effect. It adjusts the transparency of the portal based on whether theparams?.idmatches the currentidprop. - The component returns a
<group>that wraps the entire frame. - Two
<Text>components are rendered to display the name and a text prompt. - Inside the
<mesh>component, a name is assigned using theidprop. Thepositionand event handlers (onClick,onPointerOver, andonPointerOut) are set accordingly. - A
<roundedPlaneGeometry>is used to define the shape and size of the frame. - The
<MeshPortalMaterial>is used as the material for the frame. Therefis set to theportalconstant, which allows for updating its properties. Theeventsprop controls whether events are enabled based on theparams?.idmatching theidprop. - The
<color>component sets the background color of the portal. - Finally, the
childrenprop is rendered inside the portal.
3. Creating the Rig
By using this Rig component, we can configure the camera's initial position, focus point, and control settings to provide an optimal viewing experience for our 3D scene.
function Rig({ position = new THREE.Vector3(0, 0, 2), focus = new THREE.Vector3(0, 0, 0) }) {
  const { controls, scene } = useThree();
  const [, params] = useRoute('/item/:id');

  useEffect(() => {
    const active = scene.getObjectByName(params?.id);

    if (active) {
      active.parent.localToWorld(position.set(0, GOLDENRATIO * 0.75, 0.25));
      active.parent.localToWorld(focus.set(0, GOLDENRATIO / 2, -2));
    }

    controls?.setLookAt(...position.toArray(), ...focus.toArray(), true);
  });

  return <CameraControls makeDefault minPolarAngle={0} maxPolarAngle={Math.PI / 2} />;
}
This code defines a React component called Rig that sets up the camera rig and controls for the 3D scene. Let's break it down:
- The component receives two optional parameters:
positionandfocus. These parameters specify the initial position and focus point of the camera. - The
useThreehook is used to access thecontrolsandsceneobjects from the three.js library. - The
useRoutehook is used to obtain the route parameters from the URL. In this case, it looks for theidparameter in the/item/:idroute. - The
useEffecthook is used to run a side effect whenever theparams?.idvalue changes. It allows us to update the camera's position and focus based on the active object in the scene. - Inside the
useEffecthook, theactiveobject is obtained from the scene using thegetObjectByNamemethod. If an active object exists, the camera's position and focus are set using thelocalToWorldmethod. - Finally, the
setLookAtmethod of the camera controls is called to position the camera based on the specifiedpositionandfocus. TheminPolarAngleandmaxPolarAngleprops ofCameraControlsrestrict the camera's vertical rotation within a specific range. - The component returns a
CameraControlscomponent, which handles the camera movement and controls within the scene.
By using this Rig component, we can configure the camera's initial position, focus point, and control settings to provide an optimal viewing experience for our 3D scene.
4. Modifying our scene
In this step, we will modify the scene by adding various components and adjusting their positions, rotations, and backgrounds. Take a look at the updated code:
<Canvas
  camera={{ position: [0, 0, 20], fov: 75 }}
>
  <color attach="background" args={['#efefef']} />

  <group position={[0, -0.8, 0]}>
    <Frame
      id="01"
      name={`Kaio\nPlanet`}
      bg="lightseagreen"
      position={[-1.15, 0, 0]}
      rotation={[0, 0.5, 0]}
    >
      <hemisphereLight intensity={1} rotation={[0, Math.PI * -0.35, 0]}/>
      <Sky distance={450000} sunPosition={[0, 1, 0]} inclination={0} azimuth={0.25} />
      <KaioPlanet
        scale={0.75}
        position={[0.75, -0.2 , -2]}
        rotation={[0, 0.25, 0]}
      />
    </Frame>
    <Frame
      id="02"
      name={`House\non Lake`}
      position={[0, 0, -0.3]}
      bg="red"
      camera={{ fov: 75 }}
    >
      <hemisphereLight intensity={1} rotation={[0, Math.PI * -0.35, 0]}/>
      <Sky distance={450000} sunPosition={[0, 1, 0]} inclination={0} azimuth={0.25} />
      <HouseOnLake
        scale={0.5}
        position={[0.5, 0, -2]}
        rotation={[0, 0, 0]}
      />
    </Frame>
    <Frame
      id="03"
      name={`Mountain\nand River`}
      bg="#d1d1ca"
      position={[1.15, 0, 0]}
      rotation={[0, -0.5, 0]}
    >
      <hemisphereLight intensity={1} rotation={[0, Math.PI * -0.35, 0]}/>
      <Sky distance={450000} sunPosition={[0, 1, 0]} inclination={0} azimuth={0.25} />

      <MountainAndRiver
        scale={1}
        position={[0, -7, -2]}
        rotation={[0, 0, 0]}
      />
    </Frame>
  </group>

  <Rig />
</Canvas>
Here's what each part of the code does:
- The
<Canvas>component wraps the entire scene and sets the camera's initial position and field of view (FOV). - The
<color>component sets the background color of the scene to#efefef. - Inside the
<group>component, we have three<Frame>components representing different scenes or "worlds" in our application. Each<Frame>component has its uniqueid,name,bg(background color),position, androtation. - Inside each
<Frame>component, we have a combination of lighting, sky rendering, and specific 3D models such asKaioPlanet,HouseOnLake, andMountainAndRiver. These models are positioned, scaled, and rotated according to their respective frames. - The
<Rig />component sets up the camera rig and controls for the scene, allowing users to navigate and interact with the 3D environment.
By modifying the scene in this way, we create a more immersive experience with different worlds or scenes represented by the <Frame> components. Each frame can have its own background, lighting, and 3D models. The <Rig /> component ensures smooth camera movement and control within the scene.
Below the result
Optimization and best practices
In this step, we will optimize our 3D models by reducing their sizes. By implementing optimization techniques and best practices, we can improve the performance and loading times of our application. To achieve this, we will use the @gltf-transform/cli package.
Here's how to get started:
Install the package globally by running the following command in your terminal:
npm install --global @gltf-transform/cliThis command installs the @gltf-transform/cli package globally, allowing you to use it in any project.
Once installed, you can use the gltf-transform command in your terminal to optimize your 3D models. Navigate to the directory containing your model files.
To optimize a model, run the following command:
gltf-transform optimize <input-file> <output-file>Replace <input-file> with the path to your original model file and <output-file> with the desired path and name for the optimized model file.
After running the command, the optimized model will be saved to the specified output file. You can now use this optimized model in your application.

By using the @gltf-transform/cli package and running the gltf-transform optimize command, we can efficiently reduce the size of our 3D models without compromising their visual quality. This optimization step is essential for optimizing performance and ensuring a smooth user experience in our 3D web application.
Conclusion
Congratulations! You have successfully learned how to create a web app using React, Three.js, and Fiber, and have gained insights into optimizing and enhancing the 3D experience for your users. Let's recap what we covered in this tutorial:
- Installation and Setup: We set up the necessary tools and dependencies, including Node.js, npm, and npx. Additionally, we installed the required packages such as React, Three.js, and Fiber.
- Basic React Component Structure: We explored the basic structure of a React component and how to render a 3D scene using the Canvas component from the Fiber library.
- Creating the Scene: We learned how to load 3D models using the useGLTF hook and display them in the scene using the primitive component. We also added interactivity and animation to the scene using hooks like useFrame.
- Modifying the Scene: We expanded the scene by adding multiple frames, each representing a different world or environment. We used the Frame component to create portals that could lead us to new worlds within the scene.
- Optimization and Best Practices: We explored the importance of optimizing model sizes for improved performance and loading times. We installed the @gltf-transform/cli package and used the gltf-transform command to shrink the sizes of our 3D models.
By following these steps, you have gained valuable knowledge on how to create engaging web apps with 3D elements using React, Three.js, and Fiber. You have learned how to load and animate 3D models, create interactivity, and optimize your application for better performance.
Remember to experiment, explore additional features, and continuously refine your skills. The world of 3D web development is vast, and there are endless possibilities to create immersive and interactive experiences.
Now it's your turn to unleash your creativity and build remarkable web apps that engage and delight users with the power of React, Three.js, and Fiber. Happy coding!